快速入门 Gradle
在本指南中,我们会展示如何创建 build.gradle 文件以及如何配置以支持 Ktor。
目录:
- 基本的 Kotlin
build.gradle文件(不带 Ktor) - 添加 Ktor 依赖并配置构件设置
- 选择引擎并配置之
- 最终版
build.gradle(带 Ktor) - IntelliJ:前提条件
- IntelliJ:开始一个项目
- IntelliJ:Gradle 设置
- IntelliJ:创建应用
- IntelliJ:使用 Application 对象改进应用
- IntelliJ:提取配置数据
- 配置日志
基本的 Kotlin build.gradle文件(不带 Ktor)
首先,需要一个包含 Kotlin 的骨架 build.gradle 文件。
可以使用任何文本编辑器创建它,也可以使用 IntelliJ 按照
IntelliJ 指南来创建。
初始文件如下所示:
group 'Example'
version '1.0-SNAPSHOT'

buildscript {
    ext.kotlin_version = '1.4.0'

    repositories {
        mavenCentral()
    }
    dependencies {
        classpath "org.jetbrains.kotlin:kotlin-gradle-plugin:$kotlin_version"
    }
}

apply plugin: 'java'
apply plugin: 'kotlin'

sourceCompatibility = 1.8

repositories {
    jcenter()
}

dependencies {
    compile "org.jetbrains.kotlin:kotlin-stdlib-jdk8:$kotlin_version"
    testCompile group: 'junit', name: 'junit', version: '4.12'
}
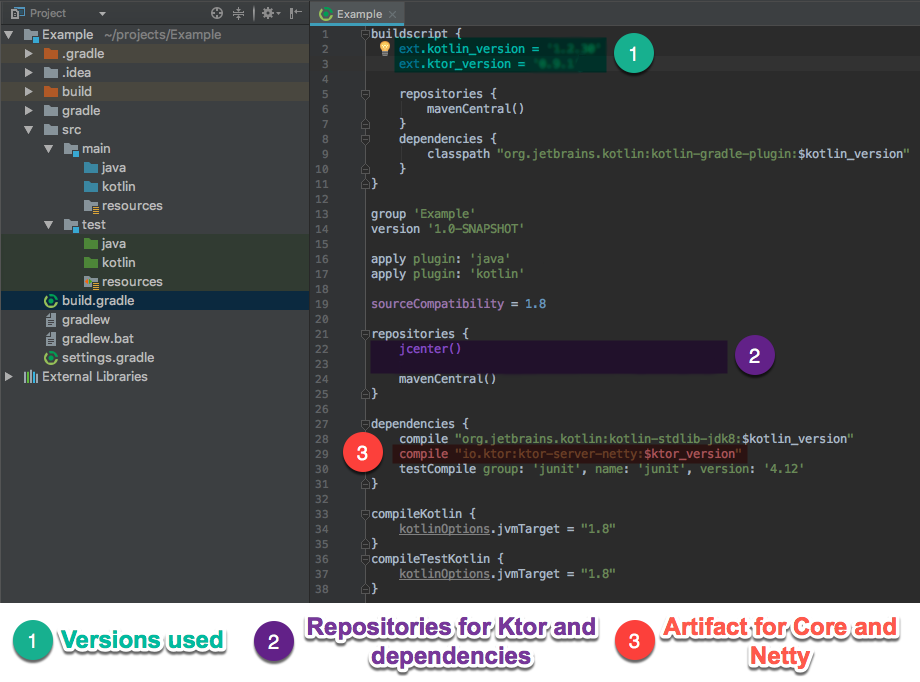
添加 Ktor 依赖并配置构件设置
Ktor 构件位于 bintray 的指定仓库中。
而其核心所依赖的 kotlinx.coroutines 库可以在 jcenter 上找到。
必须将两者都添加到 build.gradle 文件中的 repositories 块中。
jcenter()
必须在每个 Ktor 构件的引用中指定该版本,
为避免重复,可以在 buildscript 块中
(或者在 gradle.properties 文件中)的附加属性中指定该版本以便后续使用:
ext.ktor_version = '1.4.0'
现在必须添加 ktor-server-core 构件了,可引用之前指定的 ktor_version:
compile "io.ktor:ktor-server-core:$ktor_version"
在 groovy 中,有单引号括起的字符串(而不是字符) 与双引号括起的字符串,为了能够内插像版本号这样的变量,必须使用双引号括起的字符串。
需要告诉 Kotlin 编译器生成与 Java 8 兼容的字节码:
compileKotlin {
    kotlinOptions.jvmTarget = "1.8"
}
compileTestKotlin {
    kotlinOptions.jvmTarget = "1.8"
}
选择引擎并配置之
Ktor 可以在很多环境中运行,例如 Netty、 Jetty 或者任何其他 Servlet 兼容的应用容器(Application Container)例如 Tomcat。
本例展示了如何配置 Ktor 使用 Netty。 对于其他引擎请参见构件以查看可用构件的列表。
可使用之前创建的 ktor_version 属性添加依赖项 ktor-server-netty
。 这个模块提供了一个
Netty web 服务器以及运行基于其上的 Ktor
应用的所有必要代码:
compile "io.ktor:ktor-server-netty:$ktor_version"
最终版 build.gradle(带 Ktor)
完成后的 build.gradle 文件应该如下所示:
group 'Example'
version '1.0-SNAPSHOT'

buildscript {
    ext.kotlin_version = '1.4.0'
    ext.ktor_version = '1.4.0'

    repositories {
        mavenCentral()
    }
    dependencies {
        classpath "org.jetbrains.kotlin:kotlin-gradle-plugin:$kotlin_version"
    }
}

apply plugin: 'java'
apply plugin: 'kotlin'

sourceCompatibility = 1.8
compileKotlin {
    kotlinOptions.jvmTarget = "1.8"
}
compileTestKotlin {
    kotlinOptions.jvmTarget = "1.8"
}

kotlin {
    experimental {
        coroutines "enable"
    }
}

repositories {
    jcenter()
}

dependencies {
    compile "org.jetbrains.kotlin:kotlin-stdlib-jdk8:$kotlin_version"
    compile "io.ktor:ktor-server-netty:$ktor_version"
    testCompile group: 'junit', name: 'junit', version: '4.12'
}
现在可以运行 Gradle(只需 gradle,或者 ./gradlew 如果使用包装器的话)
来获取依赖并验证所有设置是否正确了。
本教程会指导你从最基本的搭建到可用于开始开发应用的全功能搭建。
IntelliJ:前提条件
- 最新版的 IntelliJ IDEA
- 已启用 Kotlin 与 Gradle 插件(它们应该都已默认启用)
可以在 IntelliJ IDEA 中通过以下主菜单查验:
- Windows:
File -> Settings -> Plugins - Mac:
IntelliJ IDEA -> Settings -> Plugins
IntelliJ:开始一个项目
-
File -> New -> Project: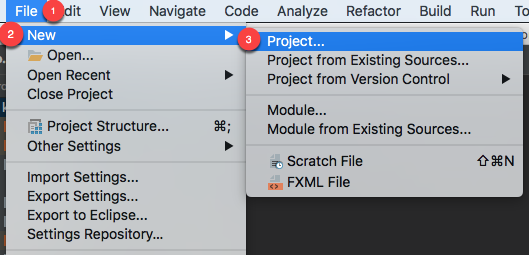
-
选择 Gradle,并且在 Additional Libraries and Frameworks 下选中 Java 与 Kotlin (Java)。 确认 Project SDK 已配置好并点击
Next: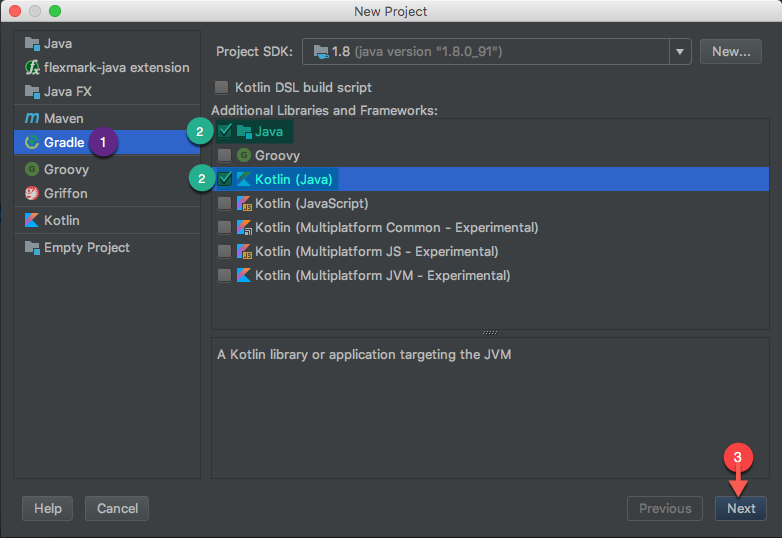
-
输入 GroupId:
Example以及 ArtifactId:Example并点击 Next: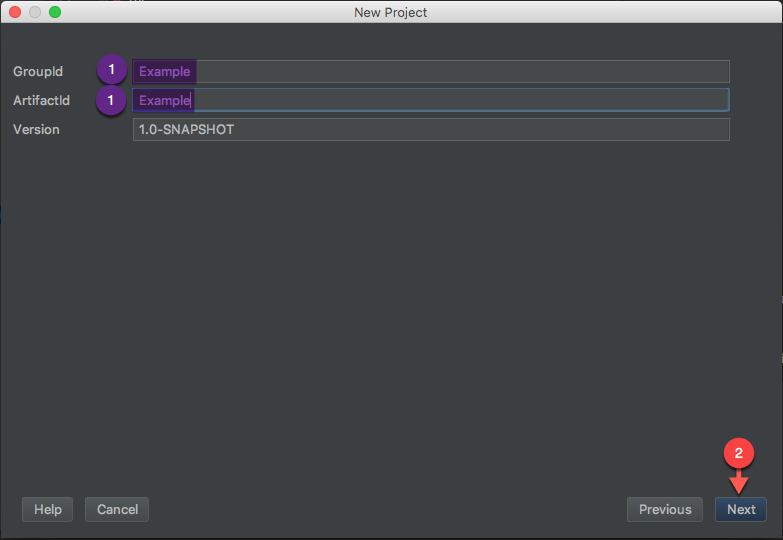
-
填写项目名:
Example与项目位置:a/path/on/your/filesystem并点击Finish: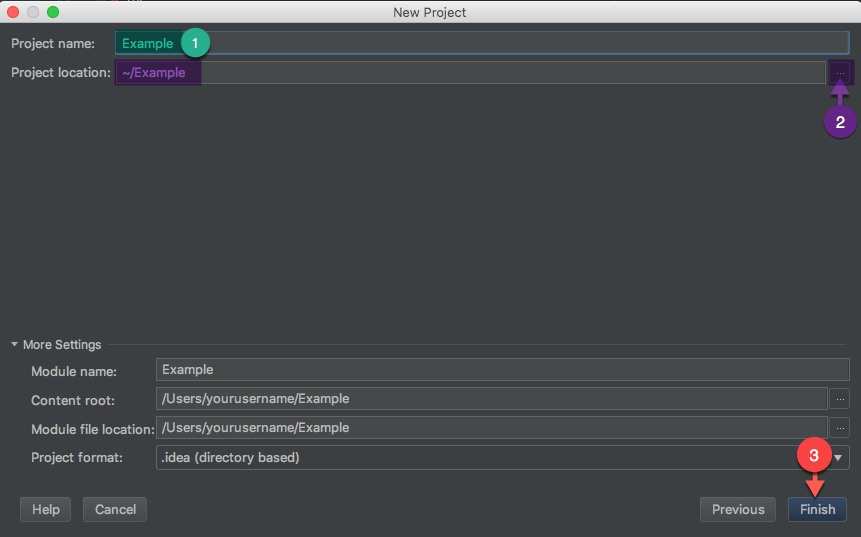
-
等待 Gradle 运行几秒,应该能看到以下项目结构(以及其他几个文件与目录):

-
更新
build.gradle文件,添加使相关类可用的构件与仓库:- 将
compile("io.ktor:ktor-server-netty:$ktor_version")包含到build.gradle的dependencies块中 - 将
maven { url = uri("http://kotlin.bintray.com/ktor") }与jcenter()包含到repositories块中
- 将
关于配置 build.gradle 文件的更详细的指南,请查阅以 Gradle 入门一节。
当显示自动导入选项(可能在右下角)时,单击允许自动导入。
IntelliJ:Gradle 设置
本节假定你对 Gradle 有一些基本的了解。如果你从未使用过 Gradle, 那么可以参考 gradle.org 提供的一些指南来帮你入门。
可以像这样使用 Gradle 搭建一个简单的 Ktor 应用:
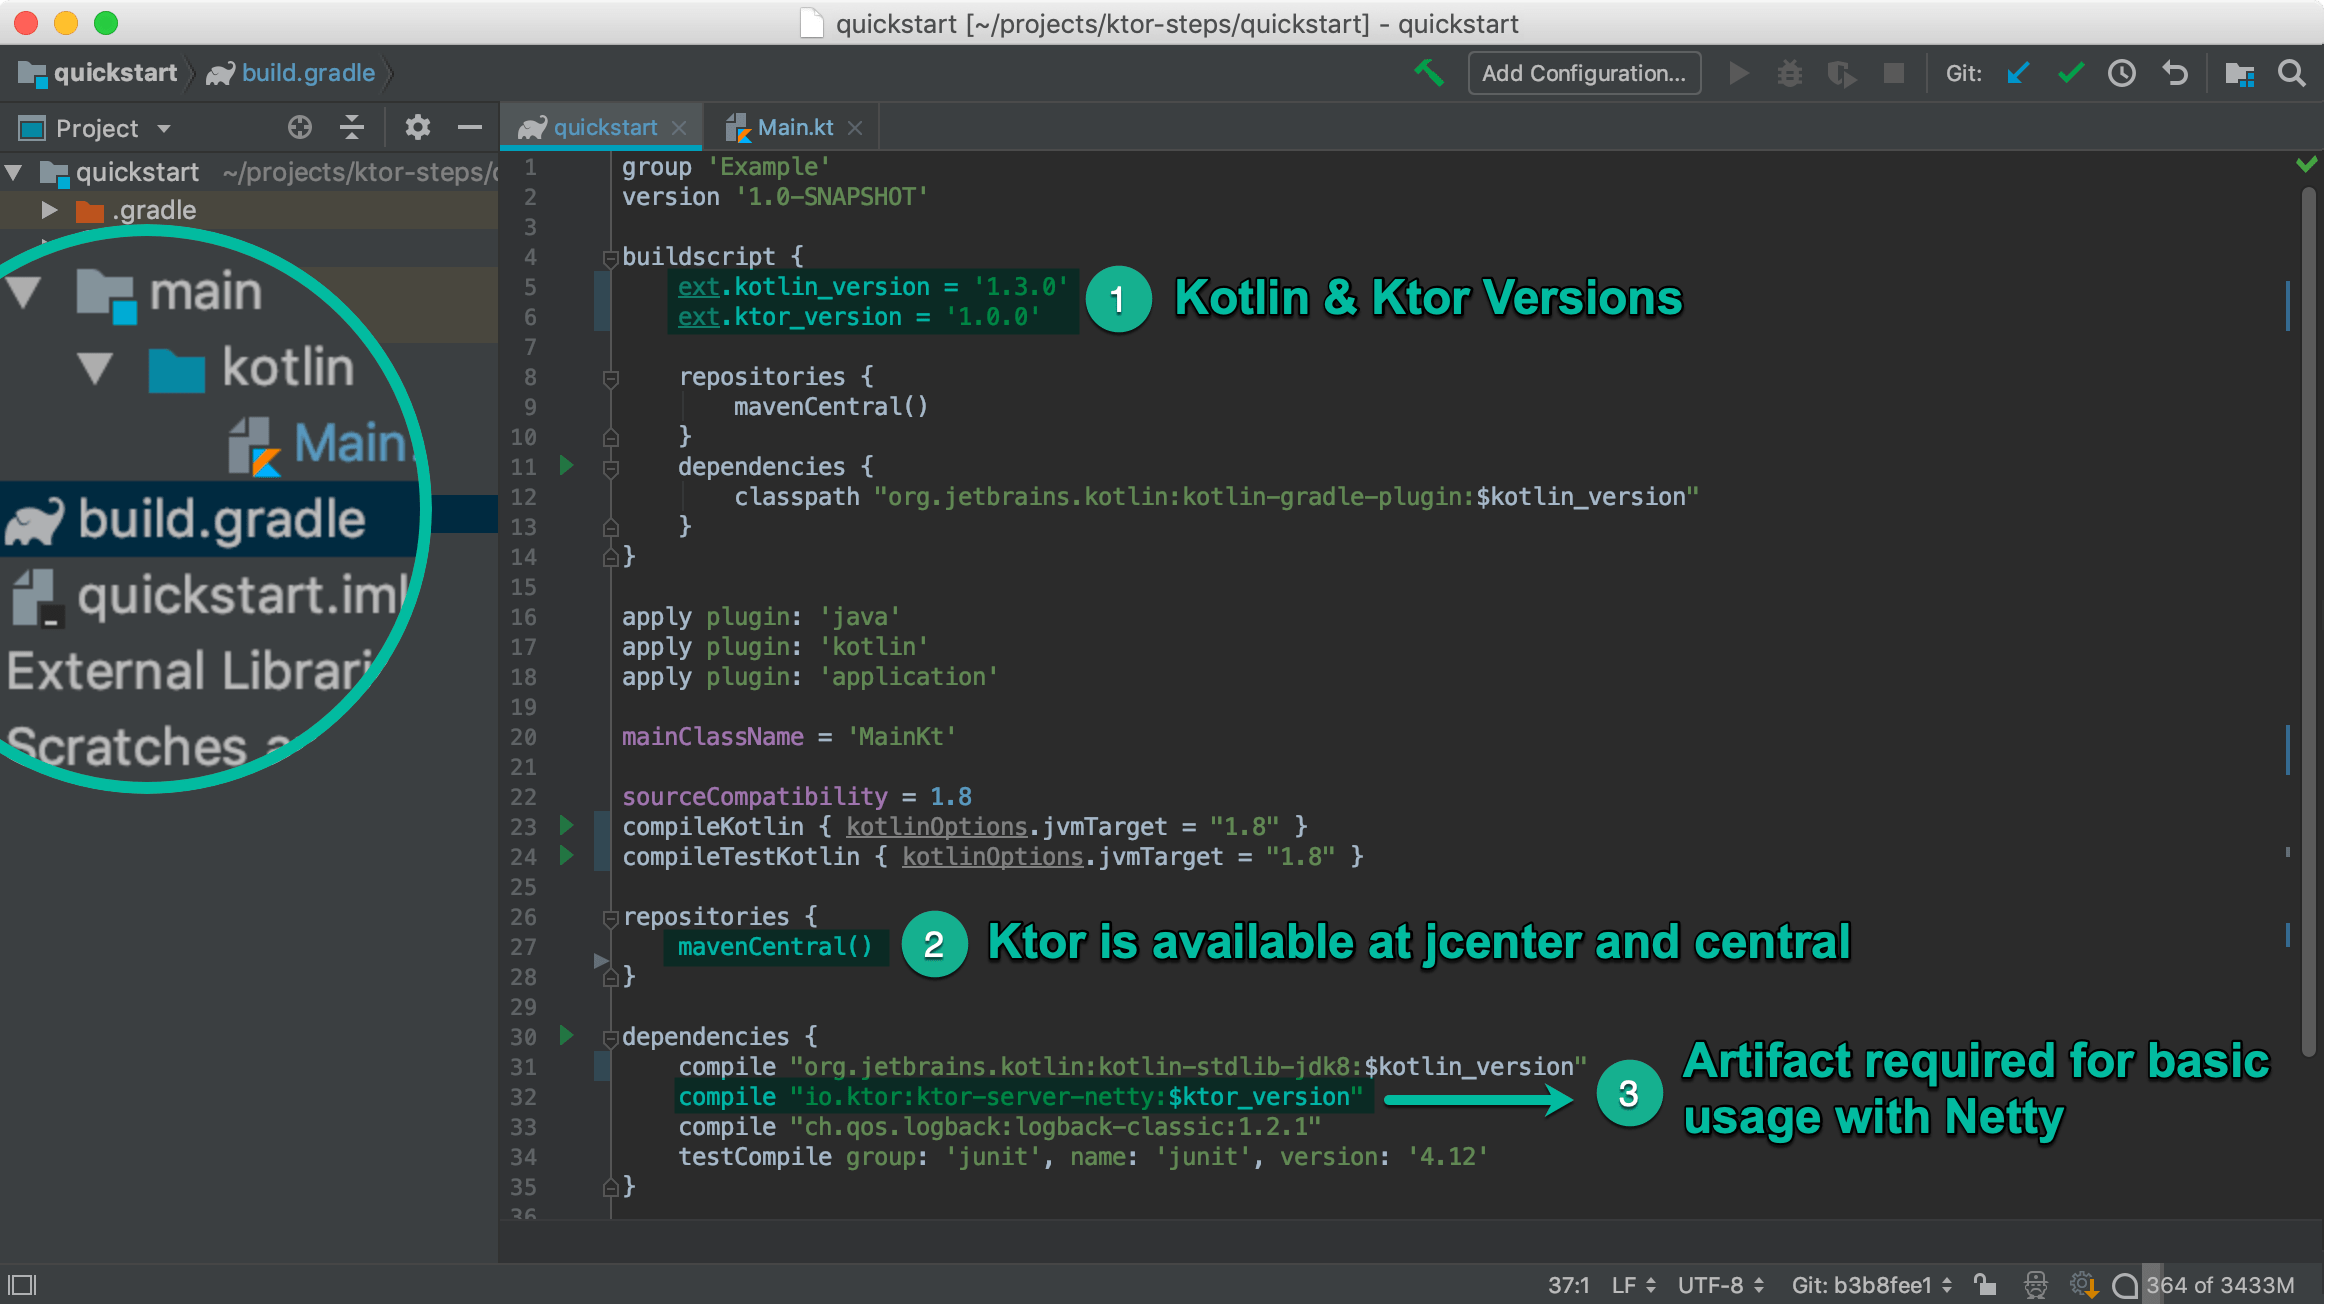
文本版:
// build.gradle

group 'Example'
version '1.0-SNAPSHOT'

buildscript {
    ext.kotlin_version = '1.4.0'
    ext.ktor_version = '1.4.0'

    repositories {
        mavenCentral()
    }
    dependencies {
        classpath "org.jetbrains.kotlin:kotlin-gradle-plugin:$kotlin_version"
    }
}

apply plugin: 'java'
apply plugin: 'kotlin'
apply plugin: 'application'

mainClassName = 'MainKt'

sourceCompatibility = 1.8
compileKotlin { kotlinOptions.jvmTarget = "1.8" }
compileTestKotlin { kotlinOptions.jvmTarget = "1.8" }

repositories {
    mavenCentral()
}

dependencies {
    compile "org.jetbrains.kotlin:kotlin-stdlib-jdk8:$kotlin_version"
    compile "io.ktor:ktor-server-netty:$ktor_version"
    compile "ch.qos.logback:logback-classic:1.2.3"
    testCompile group: 'junit', name: 'junit', version: '4.12'
}
// build.gradle.kts

import org.jetbrains.kotlin.gradle.dsl.Coroutines
import org.jetbrains.kotlin.gradle.tasks.KotlinCompile

group = "Example"
version = "1.0-SNAPSHOT"

val ktor_version = "1.4.0"

plugins {
    application
    kotlin("jvm") version "1.4.0"
}

repositories {
    mavenCentral()
}

java {
    sourceCompatibility = JavaVersion.VERSION_1_8
}

tasks.withType<KotlinCompile>().all {
    kotlinOptions.jvmTarget = "1.8"
}

application {
    mainClassName = "MainKt"
}

dependencies {
    compile(kotlin("stdlib-jdk8"))
    compile("io.ktor:ktor-server-netty:$ktor_version")
    compile("ch.qos.logback:logback-classic:1.2.3")
    testCompile(group = "junit", name = "junit", version = "4.12")
}
由于 Ktor 还没到 1.0,我们(官方)用自定义的 Maven 仓库来分发早期预览版构件。 必须设置如下所示的几个仓库,以便工具可以找到 Ktor 构件及其依赖。
当然,不要忘记包含实际的构件!对于快速入门,我们使用 ktor-server-netty 构件。
这包括 Ktor 的核心、netty 以及 ktor-netty 连接器作为传递依赖。
当然你还可以包含任何其他所需要的额外依赖。
由于 Ktor 设计为模块化的,对于指定特性会需要额外的构件并且有可能需要其他仓库。 可以在指定特性的文档中找到每个特性所需的构件(以及所需仓库)。
IntelliJ:创建应用
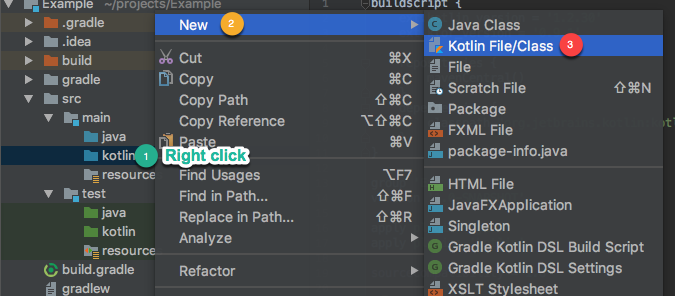
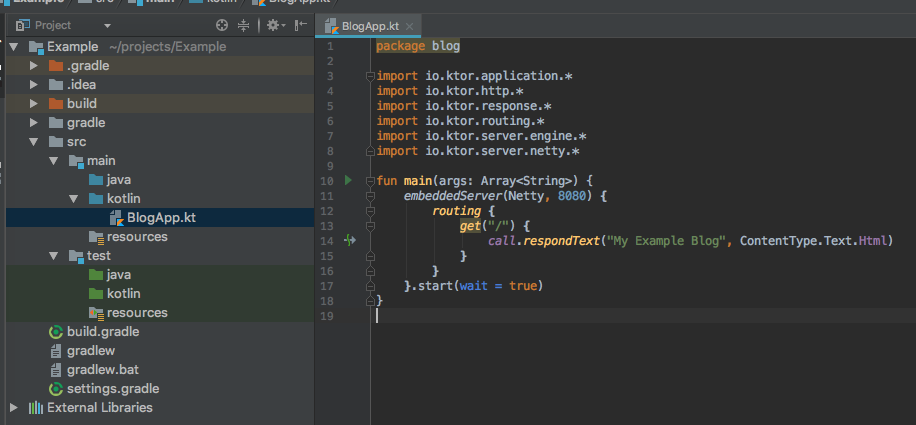
选择 src/main/kotlin 目录并创建一个新包。 我们称之为 blog。
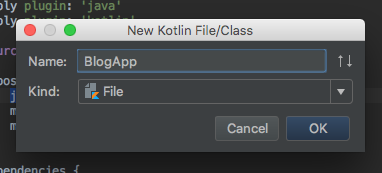
选择该目录并在其下创建一个名为 BlogApp 的新的 kotlin 文件
复制并粘贴应用的最基本设置,使其看起来像:
package blog

import io.ktor.application.*
import io.ktor.http.*
import io.ktor.response.*
import io.ktor.routing.*
import io.ktor.server.engine.*
import io.ktor.server.netty.*

fun main(args: Array<String>) {
    embeddedServer(Netty, 8080) {
        routing {
            get("/") {
                call.respondText("My Example Blog", ContentType.Text.Html)
            }
        }
    }.start(wait = true)
}
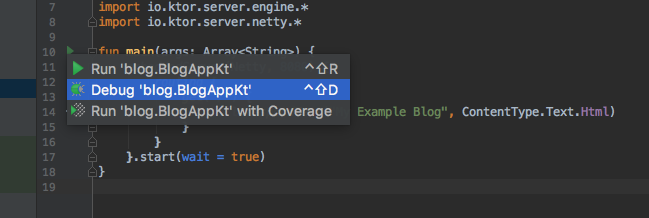
现在可以运行“blog.BlogAppKt”了。 可以这样做,点击边框中的三角图标并选择带有 🐞 符号的 Debug 'blog.BlogAppKt':
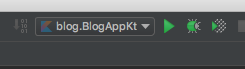
这也会在 IntelliJ 的右上角创建一个运行配置,会使再次运行该配置很容易:
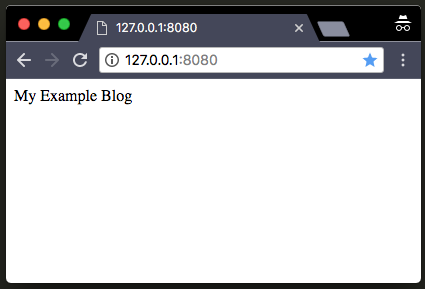
这会启动该 Netty web 服务器。 在浏览器中输入其 URL: localhost:8080 然后应该就能看到示例博客页了。
IntelliJ:使用 Application 对象改进应用
上述设置中有很多嵌套的块,而这不适合开始向应用中添加功能。 我们可以这样改进之:通过使用 Application 对象并在 main 函数中的 embeddedServer 调用引用该对象。
将 BlogApp.kt 中的代码改为以下这样来尝试这点:
package blog

import io.ktor.application.*
import io.ktor.features.*
import io.ktor.http.*
import io.ktor.response.*
import io.ktor.routing.*
import io.ktor.server.engine.*
import io.ktor.server.netty.*

fun Application.module() {
    install(DefaultHeaders)
    install(CallLogging)
    install(Routing) {
        get("/") {
            call.respondText("My Example Blog2", ContentType.Text.Html)
        }
    }
}

fun main(args: Array<String>) {
    embeddedServer(Netty, 8080, watchPaths = listOf("BlogAppKt"), module = Application::module).start()
}
IntelliJ:提取配置数据
虽然可以在主函数的 embeddedServer 调用中指定一些应用配置数据,但是要为将来的部署与更改提供更多的灵活性的话,可以将其提取到一个独立的配置文件中。在 src/main/resources 目录中创建一个新的文本文件名为 application.conf,其内容如下:
ktor {
    deployment {
        port = 8080
    }

    application {
        modules = [ blog.BlogAppKt.main ]
    }
}
然后我们在 BlogApp.kt 中删除主函数并将 fun Application.module() 改为 fun Application.main()。 然而,如果我们现在运行该应用,它会失败并且有像“Top-level function ‘main’ not found in package blog.”这样的错误信息。 我们的 Application.main() 函数现在是一个扩展函数而不具备顶层主函数的作用。
因为 IntelliJ IDEA 不能自动找到主类,这需要我们指定一个新的主类。在 build.gradle 添加:
// build.gradle

apply plugin: 'application'

//mainClassName = 'io.ktor.server.netty.DevelopmentEngine' // 对于版本 < 1.0.0-beta-3
mainClassName = 'io.ktor.server.netty.EngineMain' // 1.0.0-beta-3 起
// build.gradle.kts

plugins {
    application
    // ……
}

application {
    mainClassName = "io.ktor.server.netty.EngineMain"
}
然后转到 Run -> Edit Configurations 选择 blog.BlogAppKt 配置并将其 Main class 修改为:
io.ktor.server.netty.EngineMain
现在,当我们运行新的配置时,应用程序会再次启动。
配置日志
如果想记录应用事件及有用信息的日志, 可以在日志页中进一步阅读。